mNo edit summary |
m (added sprites to the hazards) Tag: Visual edit |
||
| (8 intermediate revisions by 5 users not shown) | |||
| Line 1: | Line 1: | ||
{{construction}} |
{{construction}} |
||
| − | <p style="text-align: center;">[[List of Mega Man 3 enemies|← ''Mega Man 3'' |
+ | <p style="text-align: center;">[[List of Mega Man 3 enemies|← ''Mega Man 3'' enemies]] | [[List of Mega Man 5 enemies|''Mega Man 5'' enemies →]]</p> |
A list of enemies and bosses that appear in ''[[Mega Man 4]]''. |
A list of enemies and bosses that appear in ''[[Mega Man 4]]''. |
||
| − | == |
+ | ==Table guide== |
{{Enemytable |
{{Enemytable |
||
|mainbg=#D9EBF2 |
|mainbg=#D9EBF2 |
||
| Line 15: | Line 15: | ||
|at1= Attack damage Mega Man takes in bars of health from his life meter. |
|at1= Attack damage Mega Man takes in bars of health from his life meter. |
||
|weak1= The Weapon that will cause the most damage against a boss in units. For enemies, it will be the Weapon that takes the least amount of shots to destroy. |
|weak1= The Weapon that will cause the most damage against a boss in units. For enemies, it will be the Weapon that takes the least amount of shots to destroy. |
||
| + | |stage1=The stage(s) that the enemy or boss appears in.}} |
||
| − | }} |
||
{{clr}} |
{{clr}} |
||
| − | |||
==Enemies== |
==Enemies== |
||
| Line 25: | Line 24: | ||
|cellbrdrbg=#006B99 |
|cellbrdrbg=#006B99 |
||
|en1= [[File:Mm4lightbulbsprite.png]]<br/>'''[[100 Watton]]''' |
|en1= [[File:Mm4lightbulbsprite.png]]<br/>'''[[100 Watton]]''' |
||
| + | |descrip1=A flying bug-like enemy that will drop bombs that explode into 5 sparks that go across the screen. They might also completely darken the room if killed. |
||
| − | |descrip1= |
||
|hp1= 1 |
|hp1= 1 |
||
|at1= 6 (contact); 4 (pod); 2 (bullet spread) |
|at1= 6 (contact); 4 (pod); 2 (bullet spread) |
||
|weak1= |
|weak1= |
||
|en2= [[File:Mm4robotgrasshoppersprite.png]]<br/>'''[[Battan]]''' |
|en2= [[File:Mm4robotgrasshoppersprite.png]]<br/>'''[[Battan]]''' |
||
| + | |descrip2=A platform robot that guides Mega Man through spikes by letting him hop on its back. |
||
| − | |descrip2= |
||
|hp2= -- |
|hp2= -- |
||
|at2= -- |
|at2= -- |
||
|weak2= |
|weak2= |
||
|en3= [[File:MM4battonton.png]]<br/>'''[[Batton#Battonton|Battonton]]''' |
|en3= [[File:MM4battonton.png]]<br/>'''[[Batton#Battonton|Battonton]]''' |
||
| + | |descrip3=An improved version of the Battons from ''Mega Man 2''. They act the exact same as they originally did, flying towards Mega Man. |
||
| − | |descrip3= |
||
|hp3= 2 |
|hp3= 2 |
||
|at3= 3 (contact) |
|at3= 3 (contact) |
||
| − | |weak3= |
+ | |weak3=[[Pharaoh Shot]] |
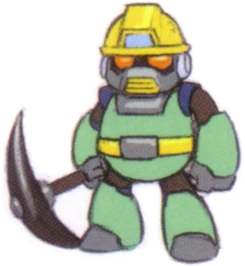
|en4= [[File:Mm4billysprite.png]]<br/>'''[[Biree]]''' |
|en4= [[File:Mm4billysprite.png]]<br/>'''[[Biree]]''' |
||
| + | |descrip4=A small electric enemy that rolls around the small platform it is usually on. |
||
| − | |descrip4= |
||
|hp4= -- |
|hp4= -- |
||
|at4= 2 (contact) |
|at4= 2 (contact) |
||
|weak4= |
|weak4= |
||
|en5= [[File:Mm4bouldersprite.png]]<br/>'''"[[Boulder]]"''' |
|en5= [[File:Mm4bouldersprite.png]]<br/>'''"[[Boulder]]"''' |
||
| + | |descrip5=A boulder that falls from chutes in Drill Man's Stage. They break into smaller piece when they hit the ground. |
||
| − | |descrip5= |
||
|hp5= 1 (boulder); 1 (debris) |
|hp5= 1 (boulder); 1 (debris) |
||
|at5= 6 (contact); 4 (debris) |
|at5= 6 (contact); 4 (debris) |
||
| − | |weak5= |
+ | |weak5=[[Pharaoh Shot]] |
|en6= [[File:MM4-Coswallown-Sprite.png]]<br/>'''[[Swallown|Coswallown]]''' |
|en6= [[File:MM4-Coswallown-Sprite.png]]<br/>'''[[Swallown|Coswallown]]''' |
||
| + | |descrip6=A small bird that swoops towards Mega Man when the mother Swallown passes by. |
||
| − | |descrip6= |
||
|hp6= 1 |
|hp6= 1 |
||
|at6= 3 (contact) |
|at6= 3 (contact) |
||
| − | |weak6= |
+ | |weak6=[[Rain Flush]] |
|en7= [[File:Mm4skullersprite.png]]<br/>'''[[Docron]]''' |
|en7= [[File:Mm4skullersprite.png]]<br/>'''[[Docron]]''' |
||
| + | |descrip7=A skull on wheels that drops down from a hatch and drives towards Mega Man. |
||
| − | |descrip7= |
||
|hp7= 4 (ceiling hatch); 1 (Docron) |
|hp7= 4 (ceiling hatch); 1 (Docron) |
||
|at7= 4 (contact, Docron); 4 (contact, hatch) |
|at7= 4 (contact, Docron); 4 (contact, hatch) |
||
| − | |weak7= [[ |
+ | |weak7= [[Wire]] (hatch) |
|en8= [[File:Mm4fireworkthrowersprite.png]]<br/>'''[[Dompan]]''' |
|en8= [[File:Mm4fireworkthrowersprite.png]]<br/>'''[[Dompan]]''' |
||
| + | |descrip8=A small walking enemy that fires a couple of harmless fireworks to light the room when Mega Man kills it. |
||
| − | |descrip8= |
||
|hp8= 1 |
|hp8= 1 |
||
|at8= 4 (contact) |
|at8= 4 (contact) |
||
| − | |weak8= |
||
|en9= [[File:Mm4dangerdispensersprite.png]]<br/>'''[[Gachappon]]''' |
|en9= [[File:Mm4dangerdispensersprite.png]]<br/>'''[[Gachappon]]''' |
||
| + | |descrip9=A gumball machine-looking enemy that will either lob projectiles at Mega Man or fire straightforward. |
||
| − | |descrip9= |
||
|hp9= 12 |
|hp9= 12 |
||
|at9= 2 (gashapon); 2 (straight shot); 6 (contact) |
|at9= 2 (gashapon); 2 (straight shot); 6 (contact) |
||
|weak9= [[Drill Bomb]] |
|weak9= [[Drill Bomb]] |
||
|en10= [[File:Mm4sparkspinesprite.png]]<br/>'''[[Gabyoall#Garyoby|Garyoby]]''' |
|en10= [[File:Mm4sparkspinesprite.png]]<br/>'''[[Gabyoall#Garyoby|Garyoby]]''' |
||
| + | |descrip10=A version of the Gabyoall that now has a large saw on the top. |
||
| − | |descrip10= |
||
|hp10= 3 |
|hp10= 3 |
||
|at10= 2 (contact) |
|at10= 2 (contact) |
||
|weak10= [[Ring Boomerang]] |
|weak10= [[Ring Boomerang]] |
||
|en11= [[File:Mm4robotfishsprite.png]]<br/>'''[[Gyotot]]''' |
|en11= [[File:Mm4robotfishsprite.png]]<br/>'''[[Gyotot]]''' |
||
| + | |descrip11=A fish enemy that leaps out of the water in hopes of hitting Mega Man. |
||
| − | |descrip11= |
||
|hp11= 1 |
|hp11= 1 |
||
|at11= 4 (contact) |
|at11= 4 (contact) |
||
| − | |weak11= |
||
|en12= [[File:Mm4desertflysprite.png]]<br/>'''[[Haehaey]]''' |
|en12= [[File:Mm4desertflysprite.png]]<br/>'''[[Haehaey]]''' |
||
| + | |descrip12=A small fly enemy that drops down bullets before retreating. |
||
| − | |descrip12= |
||
|hp12= 1 |
|hp12= 1 |
||
|at12= 2 (shots); 4 (contact) |
|at12= 2 (shots); 4 (contact) |
||
| − | |weak12= |
||
|en13= [[File:Mm4helipawnsprite.png]]<br/>'''[[Helipon]]''' |
|en13= [[File:Mm4helipawnsprite.png]]<br/>'''[[Helipon]]''' |
||
| + | |descrip13=A small flying enemy that will try to land on Mega Man. Once landed, it will fire out from its sides. |
||
| − | |descrip13= |
||
|hp13= 1 |
|hp13= 1 |
||
|at13= 4 (contact); 2 (shot) |
|at13= 4 (contact); 2 (shot) |
||
| − | |weak13= |
||
|en14= [[File:Mm4hoversprite.png]]<br/>'''[[Hover]]''' |
|en14= [[File:Mm4hoversprite.png]]<br/>'''[[Hover]]''' |
||
| + | |descrip14=An upgraded Foot Holder that waits for Mega Man and floats above spikes. It will be destroyed once it hits a wall and it will fire shots when Mega Man isn't on it. |
||
| − | |descrip14= |
||
|hp14= -- |
|hp14= -- |
||
|at14= 1 (shots) |
|at14= 1 (shots) |
||
| − | |weak14= |
||
|en15= [[File:Mm4inormsprite.png]]<br/>'''[[Imorm]]''' |
|en15= [[File:Mm4inormsprite.png]]<br/>'''[[Imorm]]''' |
||
| + | |descrip15=A worm enemy that drops from the ceiling onto Mega Man. Form there it just inches forward. |
||
| − | |descrip15= |
||
|hp15= 2 |
|hp15= 2 |
||
|at15= 4 (contact) |
|at15= 4 (contact) |
||
| − | |weak15= |
+ | |weak15=[[Ring Boomerang]] |
|en16= [[File:Mm4jumbigsprite.png]]<br/>'''[[Jumbig]]''' |
|en16= [[File:Mm4jumbigsprite.png]]<br/>'''[[Jumbig]]''' |
||
| + | |descrip16=An upgraded version of Big Eye. It acts the exact same, doing short and high hops, now easier thanks to Mega Man's slide. |
||
| − | |descrip16= |
||
|hp16= 14 |
|hp16= 14 |
||
|at16= 7 (contact) |
|at16= 7 (contact) |
||
|weak16= [[Drill Bomb]] |
|weak16= [[Drill Bomb]] |
||
|en17= [[File:Mm4ladderpresssprite.png]]<br/>'''[[Ladder Press]]''' |
|en17= [[File:Mm4ladderpresssprite.png]]<br/>'''[[Ladder Press]]''' |
||
| + | |descrip17=A machine that scales along a ladder and occasionally presses its "teeth" together. |
||
| − | |descrip17= |
||
|hp17= -- |
|hp17= -- |
||
|at17= 4 (contact); 4 (crush) |
|at17= 4 (contact); 4 (crush) |
||
| − | |weak17= |
||
|en18= [[File:Mm4m422asprite.png]]<br/>'''[[M-422A]]''' |
|en18= [[File:Mm4m422asprite.png]]<br/>'''[[M-422A]]''' |
||
| + | |descrip18=A jellyfish enemy that slams down onto the ground several times when Mega Man is near. |
||
| − | |descrip18= |
||
|hp18= -- |
|hp18= -- |
||
|at18= 4 (contact) |
|at18= 4 (contact) |
||
| − | |weak18= |
||
|en19= [[File:Mm4mantasprite.png]]<br/>'''[[Mantan]]''' |
|en19= [[File:Mm4mantasprite.png]]<br/>'''[[Mantan]]''' |
||
| + | |descrip19=A water enemy that changes its course to try and hit Mega Man. |
||
| − | |descrip19= |
||
|hp19= 2 |
|hp19= 2 |
||
|at19= 6 (contact) |
|at19= 6 (contact) |
||
| − | |weak19= |
+ | |weak19=[[Pharaoh Shot]] |
|en20= [[File:Mm4balletmetsprite.png]]<br/>'''[[Metall EX]]''' |
|en20= [[File:Mm4balletmetsprite.png]]<br/>'''[[Metall EX]]''' |
||
| + | |descrip20=An upgraded Metall that can either fire its normal pattern and jump, or it can twirl and fire 3 straight shots. |
||
| − | |descrip20= |
||
|hp20= 1 (running/jumping variant); 3 (dancing variant) |
|hp20= 1 (running/jumping variant); 3 (dancing variant) |
||
| − | |at20= 2 ( |
+ | |at20= 2 (shot); 3 (contact) |
| + | |weak20=[[Pharaoh Shot]] (dancing variant) |
||
| − | |weak20= |
||
|en21= [[File:Mm4snorkelmetsprite.png]]<br/>'''[[Metall Swim]]''' |
|en21= [[File:Mm4snorkelmetsprite.png]]<br/>'''[[Metall Swim]]''' |
||
| − | |descrip21= |
+ | |descrip21=A Metall that can fire while swimming. |
|hp21= 1 |
|hp21= 1 |
||
| − | |at21= 2 ( |
+ | |at21= 2 (shot); 3 (contact) |
| − | |weak21= |
||
|en22= [[File:Mm4fanbladesprite.png]]<br/>'''[[Minoan]]''' |
|en22= [[File:Mm4fanbladesprite.png]]<br/>'''[[Minoan]]''' |
||
| + | |descrip22=An enemy that hangs from the ceiling and drops down and spins toward Mega Man. |
||
| − | |descrip22= |
||
|hp22= 1 (mount); 2 (Minoan) |
|hp22= 1 (mount); 2 (Minoan) |
||
|at22= 4 (contact) |
|at22= 4 (contact) |
||
| − | |weak22= |
+ | |weak22=[[Rain Flush]] |
|en23= [[File:Mm4monoroadersprite.png]]<br/>'''[[Roader#Mono Roader|Mono Roader]]''' |
|en23= [[File:Mm4monoroadersprite.png]]<br/>'''[[Roader#Mono Roader|Mono Roader]]''' |
||
| + | |descrip23=An enemy on wheels that drives towards Mega Man. When it closes its eye hatch, it is invincible to buster shots and drives faster. |
||
| − | |descrip23= |
||
|hp23= 3 |
|hp23= 3 |
||
|at23= 4 (contact) |
|at23= 4 (contact) |
||
|weak23= [[Rain Flush]] |
|weak23= [[Rain Flush]] |
||
|en24= [[File:Mm4mummymaulersprite.png]]<br/>'''[[Mummira]]''' |
|en24= [[File:Mm4mummymaulersprite.png]]<br/>'''[[Mummira]]''' |
||
| + | |descrip24=A mummy enemy that appears from a rotating wall to unravel his head tape to shoot his head towards Mega Man. |
||
| − | |descrip24= |
||
|hp24= 6 |
|hp24= 6 |
||
|at24= 2 (head); 6 (contact) |
|at24= 2 (head); 6 (contact) |
||
|weak24= [[Pharaoh Shot]] / [[Dive Missile]] |
|weak24= [[Pharaoh Shot]] / [[Dive Missile]] |
||
|en25= [[File:Mm4domegunsprite.png]]<br/>'''[[Pakatto 24]]''' |
|en25= [[File:Mm4domegunsprite.png]]<br/>'''[[Pakatto 24]]''' |
||
| + | |descrip25=A small cannon enemy that fires a straight shot and shields itself when it's not firing. |
||
| − | |descrip25= |
||
|hp25= 1 |
|hp25= 1 |
||
|at25= 2 (shot); 4 (contact) |
|at25= 2 (shot); 4 (contact) |
||
| − | |weak25= |
||
|en26= [[File:Mm4amoebasprite.png]]<br/>'''[[Puyoyon]]''' |
|en26= [[File:Mm4amoebasprite.png]]<br/>'''[[Puyoyon]]''' |
||
| + | |descrip26=An enemy encased in jelly that drops down from the ceiling and charges toward Mega Man. |
||
| − | |descrip26= |
||
|hp26= 2 |
|hp26= 2 |
||
|at26= 4 (contact) |
|at26= 4 (contact) |
||
| − | |weak26= |
+ | |weak26=[[Drill Bomb]] |
|en27= [[File:Mm4umbrellaguardsprite.png]]<br/>'''[[Rackaser]]''' |
|en27= [[File:Mm4umbrellaguardsprite.png]]<br/>'''[[Rackaser]]''' |
||
| + | |descrip27=A small enemy that floats down with an umbrella and throws the umbrella at Mega Man once landed. |
||
| − | |descrip27= |
||
|hp27= 4 (Rackaser); 1 (umbrella) |
|hp27= 4 (Rackaser); 1 (umbrella) |
||
|at27= 4 (contact); 2 (umbrella) |
|at27= 4 (contact); 2 (umbrella) |
||
|weak27= [[Drill Bomb]] / [[Pharaoh Shot]] / [[Ring Boomerang]] / [[Dust Crusher]] / [[Dive Missile]] / [[Skull Barrier]] |
|weak27= [[Drill Bomb]] / [[Pharaoh Shot]] / [[Ring Boomerang]] / [[Dust Crusher]] / [[Dive Missile]] / [[Skull Barrier]] |
||
|en28= [[File:Mm4robotratsprite.png]]<br/>'''[[Ratton]]''' |
|en28= [[File:Mm4robotratsprite.png]]<br/>'''[[Ratton]]''' |
||
| + | |descrip28=A rat enemy that makes small hops towards Mega Man in the sewers. |
||
| − | |descrip28= |
||
|hp28= 2 |
|hp28= 2 |
||
|at28= 4 (contact) |
|at28= 4 (contact) |
||
|weak28= [[Drill Bomb]] / [[Pharaoh Shot]] / [[Ring Boomerang]] / [[Dust Crusher]] / [[Dive Missile]] / [[Skull Barrier]] |
|weak28= [[Drill Bomb]] / [[Pharaoh Shot]] / [[Ring Boomerang]] / [[Dust Crusher]] / [[Dive Missile]] / [[Skull Barrier]] |
||
|en29= [[File:Mm4ringaringasprite.png]]<br/>'''[[Ring Ring]]''' |
|en29= [[File:Mm4ringaringasprite.png]]<br/>'''[[Ring Ring]]''' |
||
| + | |descrip29=An enemy that acts exactly like a [[Telly]] from ''[[Mega Man 2]]''. It floats slowly towards Mega Man. |
||
| − | |descrip29= |
||
|hp29= 1 |
|hp29= 1 |
||
|at29= 4 (contact) |
|at29= 4 (contact) |
||
|weak29= |
|weak29= |
||
|en30= [[File:Mm4sandscorpionsprite.png]]<br/>'''[[Sasoreenu]]''' |
|en30= [[File:Mm4sandscorpionsprite.png]]<br/>'''[[Sasoreenu]]''' |
||
| + | |descrip30=A scorpion enemy that digs itself out of the quicksand and charges towards Mega Man. |
||
| − | |descrip30= |
||
|hp30= 4 |
|hp30= 4 |
||
|at30= 4 (contact) |
|at30= 4 (contact) |
||
|weak30=[[Ring Boomerang]] / [[Dust Crusher]] |
|weak30=[[Ring Boomerang]] / [[Dust Crusher]] |
||
| − | |en31= [[File: |
+ | |en31= [[File:Mm4shieldattackersprite.png]]<br/>'''[[Shield Attacker]]''' |
| + | |descrip31=An enemy that charges back and forth in a certain area. It has a large shield on its front, but the back is vulnerable to attacks. |
||
| − | |descrip31= |
||
| − | |hp31= |
+ | |hp31= 4 |
| − | |at31= |
+ | |at31= 4 (contact) |
| − | |weak31= |
+ | |weak31=[[Drill Bomb]] |
| − | |en32= [[File: |
+ | |en32= [[File:Mm4skeletonjoesprite.png]]<br/>'''[[Sniper Joe#Skeleton Joe|Skeleton Joe]]''' |
| + | |descrip32=A skeleton-themed [[Sniper Joe]] that lobs bones at Mega Man. It will die from one hit of anything, but it will put itself back together unless certain weapons are used or its fired at enough times. |
||
| − | |descrip32= |
||
| − | |hp32= |
+ | |hp32= 3 |
| − | |at32= 4 (contact) |
+ | |at32= 2 (bone); 4 (contact) |
| − | |weak32= [[ |
+ | |weak32= [[Flash Stopper]] |
| − | |en33= [[File: |
+ | |en33= [[File:Mm4skulmetsprite.png]]<br/>'''[[Skullmet]]''' |
| + | |descrip33=A stationary cannon enemy that lobs shots at Mega Man. It is invulnerable to most attacks on its shielded back. |
||
| − | |descrip33= |
||
|hp33= 3 |
|hp33= 3 |
||
| − | |at33= 2 ( |
+ | |at33= 2 (projectile); 6 (contact) |
| − | |weak33= [[ |
+ | |weak33= [[Dust Crusher]] / [[Ring Boomerang]] |
| − | |en34= [[File: |
+ | |en34= [[File:Mm4superballcannonsprite.png]]<br/>'''[[Super Ball Machine Jr.]]''' |
| + | |descrip34=A cannon that fires balls that bounce off walls and the ball gets faster every time it hits one. |
||
| − | |descrip34= |
||
| ⚫ | |||
| − | |hp34= 3 |
||
| − | |at34= |
+ | |at34= 1 (ball); 6 (contact) |
| − | |weak34= [[ |
+ | |weak34= [[Drill Bomb]] |
| − | |en35= [[File: |
+ | |en35= [[File:Mm4rocketbirdsprite.png]]<br/>'''[[Swallown]]''' |
| + | |descrip35=A mother bird enemy that swoops down and directs her children, the Coswallowns, toward Mega Man |
||
| − | |descrip35= |
||
| + | |hp35= 2 |
||
| ⚫ | |||
| − | |at35= |
+ | |at35= 4 (contact) |
| − | |weak35= [[ |
+ | |weak35= [[Rain Flush]] |
| − | |en36= [[File: |
+ | |en36= [[File:Mm4bugcoptersprite.png]]<br/>'''[[Taketento]]''' |
| + | |descrip36=A bug enemy that when near Mega Man, takes the propeller off and floats towards Mega Man. |
||
| − | |descrip36= |
||
| − | |hp36= 2 |
+ | |hp36= 2 (Taketento); 1 (propeller) |
|at36= 4 (contact) |
|at36= 4 (contact) |
||
| − | |weak36= |
+ | |weak36=[[Pharaoh Shot]] |
| − | |en37= [[File: |
+ | |en37= [[File:Mm4spikedpassersprite.png]]<br/>'''[[Togehero]]''' |
| + | |descrip37=A small enemy that usually is in bunches of 4 or 5 that go in a zig zag pattern toward Mega Man. |
||
| − | |descrip37= |
||
| − | |hp37= |
+ | |hp37= 1 |
|at37= 4 (contact) |
|at37= 4 (contact) |
||
|weak37= |
|weak37= |
||
| − | |en38= [[File: |
+ | |en38= [[File:Mm4tomboysprite.png]]<br/>'''[[Tom Boy]]''' |
| − | |hp38= |
+ | |hp38= 6 |
| − | |at38= |
+ | |at38= 6 (contact) |
| − | |weak38= |
+ | |weak38=[[Drill Bomb]] |
| − | |en39= [[File: |
+ | |en39= [[File:Mm4totempolesprite.png]]<br/>'''[[Totem Polen]]''' |
| + | |descrip39=A very tall totem enemy that fires from any one of its heads. |
||
| − | |descrip39= |
||
| − | |hp39= |
+ | |hp39= 8 |
| − | |at39= 6 (contact) |
+ | |at39= 2 (projectile); 6 (contact) |
| − | |weak39= [[ |
+ | |weak39= [[Rain Flush]] / [[Pharaoh Shot]] |
| − | |en40= [[File: |
+ | |en40= [[File:Mm4upndownsprite.png]]<br/>'''[[Up'n'Down]]''' |
| + | |descrip40=A small enemy that rises from pits to hit Mega Man. |
||
| − | |descrip40= |
||
| − | |hp40= |
+ | |hp40= 1 |
| − | |at40= |
+ | |at40= 3 (contact) |
| − | |weak40= |
+ | |weak40= |
| − | |en41= [[File: |
+ | |en41= [[File:Mm4wallblastersprite.png]]<br/>'''[[Wall Blaster]]''' |
| + | |descrip41=A cannon that sticks to walls and can fire straight shots at Mega Man from different angles. |
||
| − | |descrip41= |
||
| − | |hp41= |
+ | |hp41= 5 |
| − | |at41= |
+ | |at41= 4 (contact); 2 (projectile) |
| − | |weak41= |
+ | |weak41=[[Rain Flush]] |
| + | |en42= |
||
| − | |en42= [[File:Mm4wallblastersprite.png]]<br/>'''[[Wall Blaster]]''' |
||
|descrip42= |
|descrip42= |
||
| − | |hp42= |
+ | |hp42= |
| − | |at42= |
+ | |at42= |
| − | |weak42= |
+ | |weak42= |
| + | |stage1=[[Bright Man Stage|Bright Man]]|stage2=[[Bright Man Stage|Bright Man]]|stage3=[[Drill Man Stage|Drill Man]], [[Pharaoh Man Stage|Pharaoh Man]], [[Skull Man Stage|Skull Man]], [[Dr. Cossack's Citadel|Cossack Stage 2]], [[Dr. Cossack's Citadel|Cossack Stage 3]], [[Wily Castle (Mega Man 4)|Wily Stage 2]]|stage4=[[Dr. Cossack's Citadel|Cossack Stage 3]], [[Dr. Cossack's Citadel|Cossack Stage 4]]|stage5=[[Drill Man Stage|Drill Man]]|stage6=[[Toad Man Stage|Toad Man]]|stage7=[[Dr. Cossack's Citadel|Cossack Stage 3]], [[Dr. Cossack's Citadel|Cossack Stage 4]], [[Wily Castle (Mega Man 4)|Wily Stage 2]]|stage8=[[Bright Man Stage|Bright Man]]|stage9=[[Bright Man Stage|Bright Man]], [[Dust Man Stage|Dust Man]], [[Wily Castle (Mega Man 4)|Wily Stage 2]]|stage10=[[Ring Man Stage|Ring Man]], [[Dive Man Stage|Dive Man]], [[Dr. Cossack's Citadel|Cossack Stage 2]], [[Dr. Cossack's Citadel|Cossack Stage 3]], [[Wily Castle (Mega Man 4)|Wily Stage 1]], [[Wily Castle (Mega Man 4)|Wily Stage 2]],[[Wily Castle (Mega Man 4)|Wily Stage 3]]|stage11=[[Toad Man Stage|Toad Man]], [[Dive Man Stage|Dive Man]]|stage12=[[Pharaoh Man Stage|Pharaoh Man]]|stage13=[[Drill Man Stage|Drill Man]], [[Dr. Cossack's Citadel|Cossack Stage 4]]|stage14=[[Pharaoh Man Stage|Pharaoh Man]]|stage15=[[Skull Man Stage|Skull Man]], [[Wily Castle (Mega Man 4)|Wily Stage 4]]|stage16=[[Dust Man Stage|Dust Man]], [[Drill Man Stage|Drill Man]], [[Dive Man Stage|Dive Man]], [[Dr. Cossack's Citadel|Cossack Stage 2]], [[Dr. Cossack's Citadel|Cossack Stage 3]], [[Dr. Cossack's Citadel|Cossack Stage 4]]|stage17=[[Dr. Cossack's Citadel|Cossack Stage 1]], [[Dr. Cossack's Citadel|Cossack Stage 2]]|stage18=[[Dive Man Stage|Dive Man]]|stage19=[[Dive Man Stage|Dive Man]]|stage20=[[Drill Man Stage|Drill Man]], [[Dust Man Stage|Dust Man]], [[Wily Castle (Mega Man 4)|Wily Stage 1]]|stage21=[[Dive Man Stage|Dive Man]], [[Wily Castle (Mega Man 4)|Wily Stage 1]]|stage23=[[Ring Man Stage|Ring Man]], [[Drill Man Stage|Drill Man]], [[Dr. Cossack's Citadel|Cossack Stage 1]], [[Dr. Cossack's Citadel|Cossack Stage 2]], [[Wily Castle (Mega Man 4)|Wily Stage 2]]|stage22=[[Bright Man Stage|Bright Man]], [[Dr. Cossack's Citadel|Cossack Stage 2]], [[Wily Castle (Mega Man 4)|Wily Stage 3]]|stage24=[[Pharaoh Man Stage|Pharaoh Man]], [[Wily Castle (Mega Man 4)|Wily Stage 2]]|stage25=[[Drill Man Stage|Drill Man]], [[Dr. Cossack's Citadel|Cossack Stage 3]], [[Dr. Cossack's Citadel|Cossack Stage 4]]|stage26=[[Toad Man Stage|Toad Man]]|stage27=[[Toad Man Stage|Toad Man]]|stage28=[[Toad Man Stage|Toad Man]]|stage29=[[Ring Man Stage|Ring Man]], [[Dr. Cossack's Citadel|Cossack Stage 3]]|stage30=[[Pharaoh Man Stage|Pharaoh Man]]|stage31=[[Dust Man Stage|Dust Man]], [[Skull Man Stage|Skull Man]], [[Dr. Cossack's Citadel|Cossack Stage 4]], [[Wily Castle (Mega Man 4)|Wily Stage 3]]|stage32=[[Skull Man Stage|Skull Man]], [[Dr. Cossack's Citadel|Cossack Stage 1]]|stage33=[[Skull Man Stage|Skull Man]]|stage34=[[Skull Man Stage|Skull Man]]|stage35=[[Toad Man Stage|Toad Man]]|stage36=[[Dust Man Stage|Dust Man]], [[Drill Man Stage|Drill Man]], [[Pharaoh Man Stage|Pharaoh Man]], [[Wily Castle (Mega Man 4)|Wily Stage 2]]|stage37=[[Skull Man Stage|Skull Man]], [[Dr. Cossack's Citadel|Cossack Stage 1]], [[Dr. Cossack's Citadel|Cossack Stage 2]], [[Dr. Cossack's Citadel|Cossack Stage 3]]|stage38=[[Dr. Cossack's Citadel|Cossack Stage 1]], [[Dr. Cossack's Citadel|Cossack Stage 4]]|stage39=[[Bright Man Stage|Bright Man]]|stage40=[[Dust Man Stage|Dust Man]], [[Dr. Cossack's Citadel|Cossack Stage 1]], [[Dr. Cossack's Citadel|Cossack Stage 4]]|stage41=[[Ring Man Stage|Ring Man]]|stage42=|descrip38=An enemy that looks like a red spring that slinks toward Mega Man.}} |
||
| − | }} |
||
| + | {{clr}} |
||
| + | |||
| + | ==Hazards== |
||
| + | {{Enemytable|mainbg=#D9EBF2|cellbrdrbg=#006B99|headerbg=#006B99|en1=[[File:MM4CoilPlatform.png]]<br/>'''"Coil Platform"'''|descrip1=A platform that coils in from the right when Mega Man is on the coil. If Mega Man is on the coil generators at each end, nothing will happen. The coils also regenerate shortly after disappearing.|hp1=--|at1=--|stage1=[[Ring Man Stage|Ring Man]]|en2=[[File:MM4CossackPlatform.png]]<br/>'''"Cossack Platform"'''|descrip2=A platform that slowly falls when Mega Man is on it, but when he jumps off, it soars to the sky.|hp2=--|at2=--|stage2=[[Dr. Cossack's Citadel|Cossack Stage 3]]|en3=[[File:MM4DustBlock.png]]<br/>'''"Dust Block"'''|descrip3=A 1-tile large destructible block that can be broken with any weapon. They act as a normal block that can crush Mega Man as well.|hp3=--|at3=Instant death (crush)|weak3=[[Ring Boomerang]]|stage3=[[Dust Man Stage|Dust Man]]|en4=[[File:MM4SpikedSwapBlock.png]]<br/>'''"Fork Block"'''|descrip4=A 1-tile large platform that has spikes on either side, whether horizontally or vertically. They alternate every couple of seconds.|hp4=--|at4=4 (spike)|stage4=[[Dr. Cossack's Citadel|Cossack Stage 2]]|en5=[Image needed]<br/>'''Quicksand'''|descrip5=A "fluid" that Mega Man can stand on, but the longer he stands on it, the more he will be sucked down.|hp5=--|at5=Instant death (inside)|stage5=[[Pharaoh Man Stage|Pharaoh Man]]|en6=[[File:MM4RainbowPlatform.png]]<br/>'''"Rainbow Platform"'''|descrip6=A platform similar to the Coil Platform, but instead of coiling in from the right, it coils in from the left.|hp6=--|at6=--|stage6=[[Ring Man Stage|Ring Man]]|en7=[[File:Mm4craysprite.png]]<br/>'''[[Sea Mine]]'''|descrip7=A invulnerable spiked mine that floats in the water until Mega Man comes near it, where it then explodes.|hp7=--|at7=6 (contact); 2 (explosion)|stage7=[[Dive Man Stage|Dive Man]]|en8=[[File:MM4PharaohmanSpike.png]]<br/>'''[[Spikes]]'''|descrip8=Terrain that can kill Mega Man instantly if he touches them.|hp8=--|at8=Instant death (contact)|stage8=[[Ring Man Stage|Ring Man]], [[Dive Man Stage|Dive Man]], [[Skull Man Stage|Skull Man]], [[Bright Man Stage|Bright Man]], [[Dust Man Stage|Dust Man]], [[Drill Man Stage|Drill Man]], [[Toad Man Stage|Toad Man]], [[Pharaoh Man Stage|Pharaoh Man]], [[Dr. Cossack's Citadel|Cossack Stage 2]], [[Dr. Cossack's Citadel|Cossack Stage 3]], [[Wily Castle (Mega Man 4)|Wily Stage 1]], [[Wily Castle (Mega Man 4)|Wily Stage 2]]|en9=[[File:MM4AppearingBlock.png]]<br/>'''[[Yoku Block]]'''|descrip9=Disappearing and reappearing blocks that go in a certain order that Mega Man must traverse through.|hp9=--|at9=--|stage9=[[Wily Castle (Mega Man 4)|Wily Stage 1]]}} |
||
{{clr}} |
{{clr}} |
||
| Line 242: | Line 236: | ||
|cellbrdrbg=#006B99 |
|cellbrdrbg=#006B99 |
||
|en1= [[File:Mm4giantescargotsprite.png|60px]]<br/>'''[[Escaroo]]''' |
|en1= [[File:Mm4giantescargotsprite.png|60px]]<br/>'''[[Escaroo]]''' |
||
| + | |descrip1=A large snail-like sub boss that either fires off its eyes at Mega Man, or lobs bombs from its "shell" to Mega Man. Its weak point is the eyes, and they don't take damage when they are closed. |
||
| − | |descrip1= |
||
|hp1= 16 |
|hp1= 16 |
||
|at1= 4 (contact, eyes); 4 (contact, body); 2 (bombs) |
|at1= 4 (contact, eyes); 4 (contact, body); 2 (bombs) |
||
|weak1= [[Pharaoh Shot]] |
|weak1= [[Pharaoh Shot]] |
||
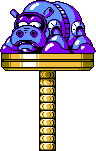
|en2= [[File:Mm4hippoplattersprite.png|50px]]<br/>'''[[Kabatoncue]]''' |
|en2= [[File:Mm4hippoplattersprite.png|50px]]<br/>'''[[Kabatoncue]]''' |
||
| + | |descrip2=A large hippo sub boss that sits on a large platform. The platform will constantly rise to its height limit, so Mega Man has to break down the platform to hit Kobatoncue while dodging the homing missiles it fires from its mouth. |
||
| − | |descrip2= |
||
|hp2= 16 (Kabatoncue); 2 (column piece); 1 (missile) |
|hp2= 16 (Kabatoncue); 2 (column piece); 1 (missile) |
||
|at2= 2 (missiles); 4 (contact) |
|at2= 2 (missiles); 4 (contact) |
||
|weak2= [[Pharaoh Shot]] |
|weak2= [[Pharaoh Shot]] |
||
|en3= [[File:Mm4mobysprite.png|60px]]<br/>'''[[Moby]]''' |
|en3= [[File:Mm4mobysprite.png|60px]]<br/>'''[[Moby]]''' |
||
| + | |descrip3=A large whale sub boss that fires missiles at Mega Man. It can also try to inhale Mega Man to make him hit the spikes below Moby. When it inhales, small spikes also rain down on Mega Man. |
||
| − | |descrip3= |
||
|hp3= 14 |
|hp3= 14 |
||
|at3= 6 (contact); 4 (missile); 2 (mines) |
|at3= 6 (contact); 4 (missile); 2 (mines) |
||
|weak3= [[Flash Stopper]] / [[Drill Bomb]] |
|weak3= [[Flash Stopper]] / [[Drill Bomb]] |
||
|en4= [[File:Mm4whappersprite.png|40px]]<br/>'''[[Whopper]]''' |
|en4= [[File:Mm4whappersprite.png|40px]]<br/>'''[[Whopper]]''' |
||
| + | |descrip4=An enemy comprised of rings and a pair of eyes. Every couple of seconds it fires out its rings in all directions in hopes of hitting Mega Man, and this is only time the eyes are vulnerable. |
||
| − | |descrip4= |
||
|hp4= 9 |
|hp4= 9 |
||
|at4= 8 (contact); 4 (rings) |
|at4= 8 (contact); 4 (rings) |
||
|weak4= [[Flash Stopper]] / [[Drill Bomb]] / [[Pharaoh Shot]] |
|weak4= [[Flash Stopper]] / [[Drill Bomb]] / [[Pharaoh Shot]] |
||
| + | |stage1=[[Toad Man Stage|Toad Man]]|stage2=[[Ring Man Stage|Ring Man]]|stage3=[[Dive Man Stage|Dive Man]]|stage4=[[Ring Man Stage|Ring Man]]}} |
||
| − | }} |
||
{{clr}} |
{{clr}} |
||
| Line 270: | Line 264: | ||
|cellbrdrbg=#006B99 |
|cellbrdrbg=#006B99 |
||
|en1= [[File:Brightsprite.png]]<br/>'''[[Bright Man]]'''<br>'''DWN-025''' |
|en1= [[File:Brightsprite.png]]<br/>'''[[Bright Man]]'''<br>'''DWN-025''' |
||
| + | |descrip1=A Robot Master built by Dr. Cossack to explore dark areas with his lightbulb head. He can fire regular shots at a certain angle towards Mega Man, mostly in groups of 3, or he can use his Flash Stopper to freeze Mega Man and either jump into him or fire at him. |
||
| − | |descrip1= |
||
|hp1= 28 |
|hp1= 28 |
||
|wpn1= [[Flash Stopper]] |
|wpn1= [[Flash Stopper]] |
||
| − | |at1= 8 (contact); 4 ( |
+ | |at1= 8 (contact); 4 (shot) |
|weak1= [[Rain Flush]] |
|weak1= [[Rain Flush]] |
||
|en2= [[File:Toadsprite.png]]<br/>'''[[Toad Man]]'''<br>'''DWN-026''' |
|en2= [[File:Toadsprite.png]]<br/>'''[[Toad Man]]'''<br>'''DWN-026''' |
||
| + | |descrip2=A Robot Master built by Dr. Cossack to irrigate crops during droughts. He can jump towards Mega Man or use his Rain Flush that clears the whole screen. If Mega Man fires at him when he winds up the Rain Flush, it will be cancelled. |
||
| − | |descrip2= |
||
|hp2= 28 |
|hp2= 28 |
||
|wpn2= [[Rain Flush]] |
|wpn2= [[Rain Flush]] |
||
| Line 282: | Line 276: | ||
|weak2= [[Drill Bomb]] |
|weak2= [[Drill Bomb]] |
||
|en3= [[File:Drillsprite.png]]<br/>'''[[Drill Man]]'''<br>'''DWN-027''' |
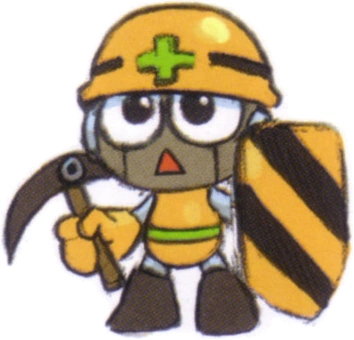
|en3= [[File:Drillsprite.png]]<br/>'''[[Drill Man]]'''<br>'''DWN-027''' |
||
| + | |descrip3=A Robot Master built by Dr. Cossack to dig in construction sites. He can drill down and resurface underneath Mega Man or charge towards Mega Man and fire Drill Bombs at him. |
||
| − | |descrip3= |
||
|hp3= 28 |
|hp3= 28 |
||
|wpn3= [[Drill Bomb]] |
|wpn3= [[Drill Bomb]] |
||
| Line 288: | Line 282: | ||
|weak3= [[Dive Missile]] |
|weak3= [[Dive Missile]] |
||
|en4= [[File:Pharaohsprite.png]]<br/>'''[[Pharaoh Man]]'''<br>'''DWN-028''' |
|en4= [[File:Pharaohsprite.png]]<br/>'''[[Pharaoh Man]]'''<br>'''DWN-028''' |
||
| + | |descrip4=A Robot Master built by Dr. Cossack to explore pyramids and other ruins. He can jump and fire his Pharaoh Shots at Mega Man or he can charge up a Pharaoh Wave that will make a wave of fire go across the screen. |
||
| − | |descrip4= |
||
|hp4= 28 |
|hp4= 28 |
||
|wpn4= [[Pharaoh Shot]] |
|wpn4= [[Pharaoh Shot]] |
||
| Line 294: | Line 288: | ||
|weak4= [[Flash Stopper]] |
|weak4= [[Flash Stopper]] |
||
|en5= [[File:Ringsprite.png]]<br/>'''[[Ring Man]]'''<br>'''DWN-029''' |
|en5= [[File:Ringsprite.png]]<br/>'''[[Ring Man]]'''<br>'''DWN-029''' |
||
| + | |descrip5=A Robot Master built by Dr. Cossack to specifically take down Mega Man. He can fire his Ring Boomerangs from a low ground stance or when he jumps up high, but the ring will always return to him. |
||
| − | |descrip5= |
||
|hp5= 28 |
|hp5= 28 |
||
|wpn5= [[Ring Boomerang]] |
|wpn5= [[Ring Boomerang]] |
||
| Line 300: | Line 294: | ||
|weak5= [[Pharaoh Shot]] |
|weak5= [[Pharaoh Shot]] |
||
|en6= [[File:Dustsprite.png]]<br/>'''[[Dust Man]]'''<br>'''DWN-030''' |
|en6= [[File:Dustsprite.png]]<br/>'''[[Dust Man]]'''<br>'''DWN-030''' |
||
| + | |descrip6=A Robot Master built by Dr. Cossack for sanitation. He can try to inhale Mega Man with his vacuum, or he can use the parts he collected from him inhaling and spit them back out as a Dust Crusher. |
||
| − | |descrip6= |
||
|hp6= 28 |
|hp6= 28 |
||
|wpn6= [[Dust Crusher]] |
|wpn6= [[Dust Crusher]] |
||
| Line 306: | Line 300: | ||
|weak6= [[Ring Boomerang]] |
|weak6= [[Ring Boomerang]] |
||
|en7= [[File:Divesprite.png]]<br/>'''[[Dive Man]]'''<br>'''DWN-031''' |
|en7= [[File:Divesprite.png]]<br/>'''[[Dive Man]]'''<br>'''DWN-031''' |
||
| + | |descrip7=A Robot Master built by Dr. Cossack with the AI functions of a submarine. He can torpedo towards Mega Man, or he can fire 2 Dive Missiles which will home in on Mega Man. |
||
| − | |descrip7= |
||
|hp7= 28 |
|hp7= 28 |
||
|wpn7= [[Dive Missile]] |
|wpn7= [[Dive Missile]] |
||
| Line 312: | Line 306: | ||
|weak7= [[Skull Barrier]] |
|weak7= [[Skull Barrier]] |
||
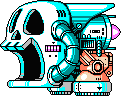
|en8= [[File:Skullsprite.png]]<br/>'''[[Skull Man]]'''<br>'''DWN-032''' |
|en8= [[File:Skullsprite.png]]<br/>'''[[Skull Man]]'''<br>'''DWN-032''' |
||
| + | |descrip8=A Robot Master built by Dr. Cossack to specifically hunt Mega Man. He can fire his buster at Mega Man or he can charge towards Mega Man and use his Skull Barrier. |
||
| − | |descrip8= |
||
|hp8= 28 |
|hp8= 28 |
||
|wpn8= [[Skull Barrier]] |
|wpn8= [[Skull Barrier]] |
||
| − | |at8= 8 (contact); 4 ( |
+ | |at8= 8 (contact); 4 (shot); 0 (Skull Barrier) |
| + | |weak8= [[Dust Crusher]]|stage1=[[Bright Man Stage|Bright Man]], [[Wily Castle (Mega Man 4)|Wily Stage 3]]|stage2=[[Toad Man Stage|Toad Man]], [[Wily Castle (Mega Man 4)|Wily Stage 3]]|stage3=[[Drill Man Stage|Drill Man]], [[Wily Castle (Mega Man 4)|Wily Stage 3]]|stage4=[[Pharaoh Man Stage|Pharaoh Man]], [[Wily Castle (Mega Man 4)|Wily Stage 3]]|stage5=[[Ring Man Stage|Ring Man]], [[Wily Castle (Mega Man 4)|Wily Stage 3]]|stage6=[[Dust Man Stage|Dust Man]], [[Wily Castle (Mega Man 4)|Wily Stage 3]]|stage7=[[Dive Man Stage|Dive Man]], [[Wily Castle (Mega Man 4)|Wily Stage 3]]|stage8=[[Skull Man Stage|Skull Man]], [[Wily Castle (Mega Man 4)|Wily Stage 3]]}} |
||
| − | |weak8= [[Dust Crusher]]}} |
||
{{clr}} |
{{clr}} |
||
| Line 325: | Line 319: | ||
|cellbrdrbg=#006B99 |
|cellbrdrbg=#006B99 |
||
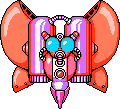
|en1= [[File:Mm4robotmothsprite.png|60px]]<br/>'''[[Mothraya]]''' |
|en1= [[File:Mm4robotmothsprite.png|60px]]<br/>'''[[Mothraya]]''' |
||
| + | |descrip1=A large moth boss that can fire 2 angled shots toward Mega Man, or break down the floor with its spear. Its only weak point is the orb on its chest. |
||
| − | |descrip1= |
||
|hp1= 28 |
|hp1= 28 |
||
|at1= 4 (energy shot); 7 (contact, body); 7 (contact, spike) |
|at1= 4 (energy shot); 7 (contact, body); 7 (contact, spike) |
||
|weak1= [[Ring Boomerang]] |
|weak1= [[Ring Boomerang]] |
||
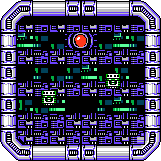
|en2= [[File:Mm4squaremachinesprite.png|50px]]<br/>'''[[Square Machine]]''' |
|en2= [[File:Mm4squaremachinesprite.png|50px]]<br/>'''[[Square Machine]]''' |
||
| + | |descrip2=A large square shaped machine that splits into 3 parts and goes across screens before slowing down and locking together. From there Mega Man has to get on the 2 moving platforms to hit the red eye while it fires energy shots at Mega Man. |
||
| − | |descrip2= |
||
|hp2= 28 |
|hp2= 28 |
||
|at2= 4 (bottom crush); 4 (projectile); 6 (jewel) |
|at2= 4 (bottom crush); 4 (projectile); 6 (jewel) |
||
|weak2= [[Dust Crusher]] |
|weak2= [[Dust Crusher]] |
||
| − | |en3= [[File:Mm4metalcrawlerssprite.png]] [[File:Mm4metalcrawlerssprite.png]]<br/>'''[[Cockroach Twin |
+ | |en3= [[File:Mm4metalcrawlerssprite.png]] [[File:Mm4metalcrawlerssprite.png]]<br/>'''[[Cockroach Twin]]s''' |
| + | |descrip3=2 large bug bosses that come out one at a time. The first one is slower and fires 2 angled shots or 1 straight shot. The second one is much faster and can climb any wall, as well as being able to fire 4 angled shots and 1 charged shot. |
||
| − | |descrip3= |
||
|hp3= 28: 14 each Cockroach Twin |
|hp3= 28: 14 each Cockroach Twin |
||
|at3= 8 (contact); 4 (straight shot); 4 (diagonal shot); 4 (shot spread); 6 (large shot) |
|at3= 8 (contact); 4 (straight shot); 4 (diagonal shot); 4 (shot spread); 6 (large shot) |
||
|weak3= [[Drill Bomb]] / [[Ring Boomerang]] |
|weak3= [[Drill Bomb]] / [[Ring Boomerang]] |
||
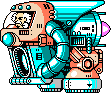
|en4= [[File:Cossack_catcher.png|50px]]<br/>'''[[Cossack Catcher]]''' |
|en4= [[File:Cossack_catcher.png|50px]]<br/>'''[[Cossack Catcher]]''' |
||
| + | |descrip4=The final boss in the citadel, and Dr. Cossack is piloting it directly. He can fire 2 diagonal shots or he can try and grab Mega Man if he's underneath him. |
||
| − | |descrip4= |
||
|hp4= 28 |
|hp4= 28 |
||
|at4= 8 (contact); 6 (catcher slam); 2 (shots) |
|at4= 8 (contact); 6 (catcher slam); 2 (shots) |
||
|weak4= [[Dust Crusher]] |
|weak4= [[Dust Crusher]] |
||
|en5= [[File:Mm4metkingsprite.png|50px]]<br/>'''[[Metall Daddy]]''' |
|en5= [[File:Mm4metkingsprite.png|50px]]<br/>'''[[Metall Daddy]]''' |
||
| + | |descrip5=A large Metall that either jumps towards Mega Man, or slams the ground so hard that it makes Mets fall from the ground. |
||
| − | |descrip5= |
||
|hp5= 28 (Metall Daddy); 1 (Metall) |
|hp5= 28 (Metall Daddy); 1 (Metall) |
||
|at5= 7 (contact); 3 (contact, Metall) |
|at5= 7 (contact); 3 (contact, Metall) |
||
|weak5= [[Ring Boomerang]] / [[Dust Crusher]] |
|weak5= [[Ring Boomerang]] / [[Dust Crusher]] |
||
|en6= [[File:Mm4octopusfurnacesprite.png|60px]]<br/>'''[[Tako Trash]]''' |
|en6= [[File:Mm4octopusfurnacesprite.png|60px]]<br/>'''[[Tako Trash]]''' |
||
| + | |descrip6=A large boss that was originally used for burning trash. It fires large ball bombs from its chute on its head, or it can shoot fireballs from its mouth. The weak point is the green orb on its head, and it can only be reached by getting on the moving platforms. |
||
| − | |descrip6= |
||
|hp6= 28 |
|hp6= 28 |
||
|at6= 4 (ball); 6 (fireball); 8 (contact) |
|at6= 4 (ball); 6 (fireball); 8 (contact) |
||
|weak6= [[Ring Boomerang]] |
|weak6= [[Ring Boomerang]] |
||
|en7= [[File:Mm4wilymachinesprite.png|70px]]<br/>'''[[Wily Machine 4]]'''<br>'''1st Phase''' |
|en7= [[File:Mm4wilymachinesprite.png|70px]]<br/>'''[[Wily Machine 4]]'''<br>'''1st Phase''' |
||
| + | |descrip7=The fourth iteration of the Wily Machine, and the first to use the "skull design". It fires several large energy balls forward while moving up and down. |
||
| − | |descrip7= |
||
|hp7= 28 |
|hp7= 28 |
||
|at7= 4 (energy balls); 6 (contact) |
|at7= 4 (energy balls); 6 (contact) |
||
|weak7= [[Ring Boomerang]] |
|weak7= [[Ring Boomerang]] |
||
|en8= [[File:MM4-WilyMachine4Phase2-Sprite.png|70px]]<br/>'''[[Wily Machine 4]]'''<br>'''2nd Phase''' |
|en8= [[File:MM4-WilyMachine4Phase2-Sprite.png|70px]]<br/>'''[[Wily Machine 4]]'''<br>'''2nd Phase''' |
||
| + | |descrip8=A damaged version of the Wily Machine 4 with Wily now exposed. Instead of going up and down, it will go forward and back. The energy balls now also fire towards Mega Man. The weak point is the orb underneath the cockpit. |
||
| − | |descrip8= |
||
|hp8= 28 |
|hp8= 28 |
||
|at8= 4 (energy balls); 6 (contact) |
|at8= 4 (energy balls); 6 (contact) |
||
|weak8= [[Drill Bomb]] |
|weak8= [[Drill Bomb]] |
||
|en9= [[File:MM4-WilyCapsule-Sprite.png]]<br/>'''[[Wily Capsule#Mega Man 4|Wily Capsule]]''' |
|en9= [[File:MM4-WilyCapsule-Sprite.png]]<br/>'''[[Wily Capsule#Mega Man 4|Wily Capsule]]''' |
||
| + | |descrip9=The first Wily Capsule to ever be built. This Wily Capsule is shrouded in complete darkness and will only be shown for a split second before he uses the energy ball to fire it towards Mega Man. |
||
| − | |descrip9= |
||
|hp9= 28 |
|hp9= 28 |
||
|at9= 8 (energy ball); 6 (contact) |
|at9= 8 (energy ball); 6 (contact) |
||
|weak9= [[Pharaoh Shot]] |
|weak9= [[Pharaoh Shot]] |
||
| + | |stage1=[[Dr. Cossack's Citadel|Cossack Stage 1]]|stage2=[[Dr. Cossack's Citadel|Cossack Stage 2]]|stage3=[[Dr. Cossack's Citadel|Cossack Stage 3]]|stage4=[[Dr. Cossack's Citadel|Cossack Stage 4]]|stage5=[[Wily Castle (Mega Man 4)|Wily Stage 1]]|stage7=[[Wily Castle (Mega Man 4)|Wily Stage 3]]|stage6=[[Wily Castle (Mega Man 4)|Wily Stage 2]]|stage8=[[Wily Castle (Mega Man 4)|Wily Stage 3]]|stage9=[[Wily Castle (Mega Man 4)|Wily Stage 4]]}} |
||
| − | }} |
||
{{clr}} |
{{clr}} |
||
| − | |||
{{-}} |
{{-}} |
||
| − | {{ |
+ | {{MM4}} |
{{classic}} |
{{classic}} |
||
[[Category:Mega Man 4 enemies| ]] |
[[Category:Mega Man 4 enemies| ]] |
||
Latest revision as of 21:02, 4 April 2024
← Mega Man 3 enemies | Mega Man 5 enemies →
A list of enemies and bosses that appear in Mega Man 4.
Table guide
| |||||||||||||||||||||||||||||||||||||||||||||||||||||||||||||||
Enemies
| |||||||||||||||||||||||||||||||||||||||||||||||||||||||||||||||||||||||||||||||||||||||||||||||||||||||||||||||||||||||||||||||||||||||||||||||||||||||||||||||||||||||||||||||||||||||||||||||||||||||||||||||||||||||||||||||||||||||||||||||||||||||||||||||||||||||||||||||||||||||||||||||||||||||||||||||||||||||||||||||||||||||||||||||||||||||||||||||||||||||||||||||||||||||||||||||||||||||||||||||||||||||||||||||||||||||||||||||||||||||||||||||||||||||||||||||||||||||
Hazards
| |||||||||||||||||||||||||||||||||||||||||||||||||||||||||||||||||||||||||||||||||||||||||||||||||||||||||||||||||||||||||||||||||||||
Sub-Bosses
| ||||||||||||||||||||||||||||||||||||||||||||||||||||||||||||||||||||||||||||||||||||||||||||||
Robot Masters
| ||||||||||||||||||||||||||||||||||||||||||||||||||||||||||||||||||||||||||||||||||||||||||||||||||||||||||||||||||||||||||||||||||||||||||||||||||||||||||
Bosses
| |||||||||||||||||||||||||||||||||||||||||||||||||||||||||||||||||||||||||||||||||||||||||||||||||||||||||||||||||||||||||||||||||||||||||||||||||||||